In this post we will talk about how to generate an SSL certificate using Let’s Encrypt with a Wildcard to a domain and using DNS as a challenge.
We will use this type of configuration for two reasons:
- DNS Challenge: Because in our router, we do not have the capacity to open the necessary WEB ports by certbot (80 and 443).
- Wildcard: Because we have total control in the domain, which allows us to have all our services with the same certificate and add the TXT entry required by this configuration.
Installation
Fedora:
sudo dnf install certbotMacOs:
brew install certbot
Further documentation on installation and usage can be found in the official documentation.
The commands executed in this post were performed with the following version of certbot:
| |
Certificate generation
The command to execute would be as follows:
| |
In case you want to run it without root, you must pass these parameters:
| |
In my case, when using zsh the domain must be enclosed in quotation marks or it will fail with the error: zsh: no matches found: *.procamora.com
This command is interactive and will ask us a series of questions, one of them is that we create a TXT record in our domain, to verify that we are the owners of this. We do this with the service with which we have purchased the domain.
| |
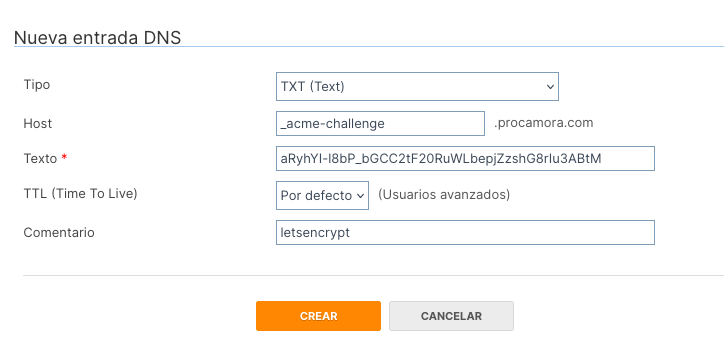
Once created, the change should propagate within seconds or minutes, depending on our DNS provider. We can verify that the TXT entry was created correctly with any of the following commands:
| |
If everything went well, the certificates will be created in the following paths (provided by the script, they may change depending on the system).
| |
And it provides us with information on how to renew the certificate in 3 months when it expires.
| |
Cron
My recommendation is to update the certificate with the following command within a cron:
| |
Although the certificate expires in 90 days, I try to renew it every 15 days to avoid that it could expire before I have renewed it, forcing me to generate it again. The cron is every 15 days because this server is not always on.
The official documentation recommends running the following command for automatic renewal:
| |
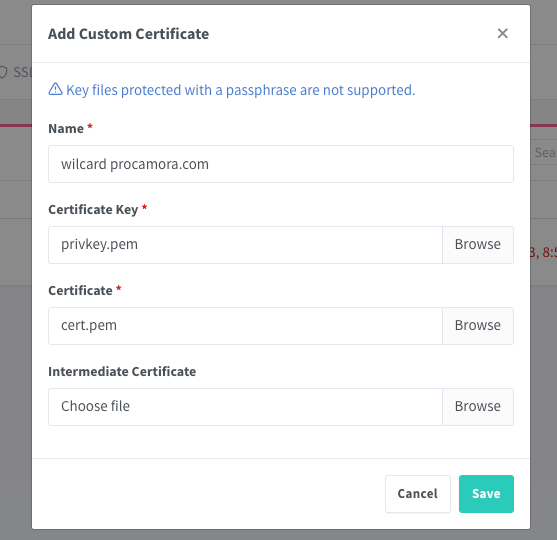
Nginx Proxy Manager
The last step would be to use the certificate, in my personal case I use Nginx Proxy Manager for the ease it provides me for the management of hosts and ACLs.